> ## Documentation Index
> Fetch the complete documentation index at: https://bruno-a6972042-docs-timeline-scripts.mintlify.site/llms.txt
> Use this file to discover all available pages before exploring further.
# Import and Export Workspace
Bruno workspaces allow you to group multiple collections together in a single workspace. You can import and export entire workspaces to easily share them with your team or migrate between environments.
A workspace can contain multiple collections, along with global environment variables and workspace-level settings.
## Export Workspace
Exporting a workspace allows you to package all collections and configurations into a single file for sharing or backup.
### Steps to Export a Workspace
1. Open Bruno and navigate to your workspace
2. Click the `...` (ellipsis) menu at the top
3. Select **Export Workspace**
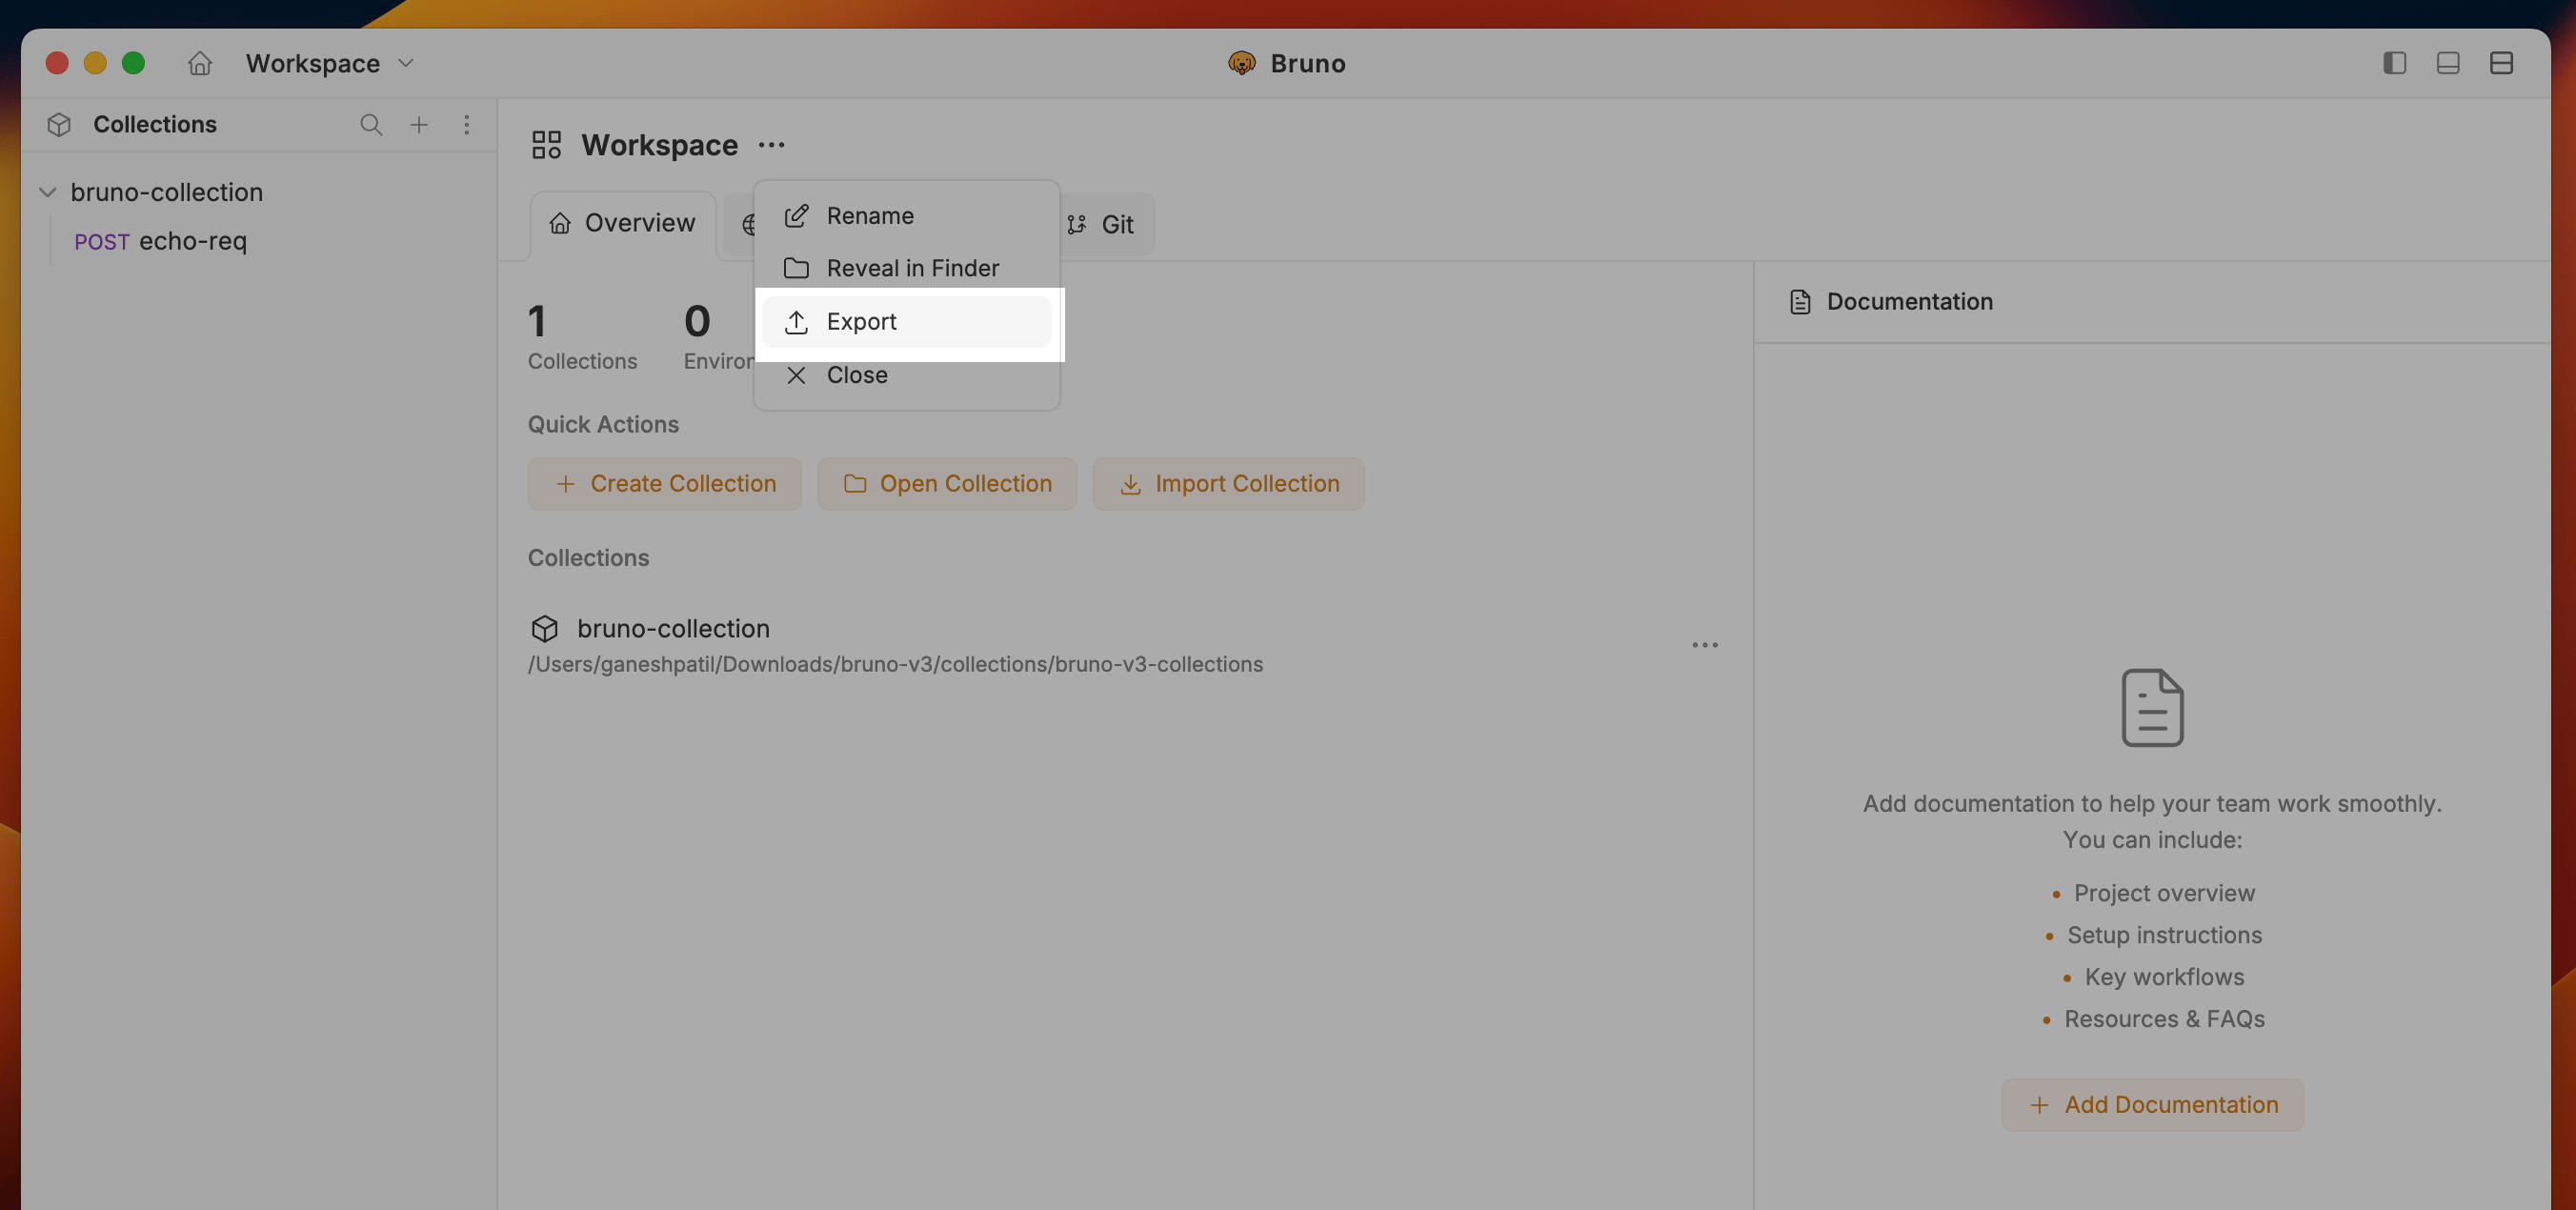 4. After export you will get `.zip` file with all collections and configurations.
***
## Import Workspace
You can import a workspace in two ways: from a ZIP file or by cloning from a Git repository.
### Option 1: Import from ZIP File
**Use this when:** You have an exported workspace file or received a workspace backup from a colleague.
**Steps:**
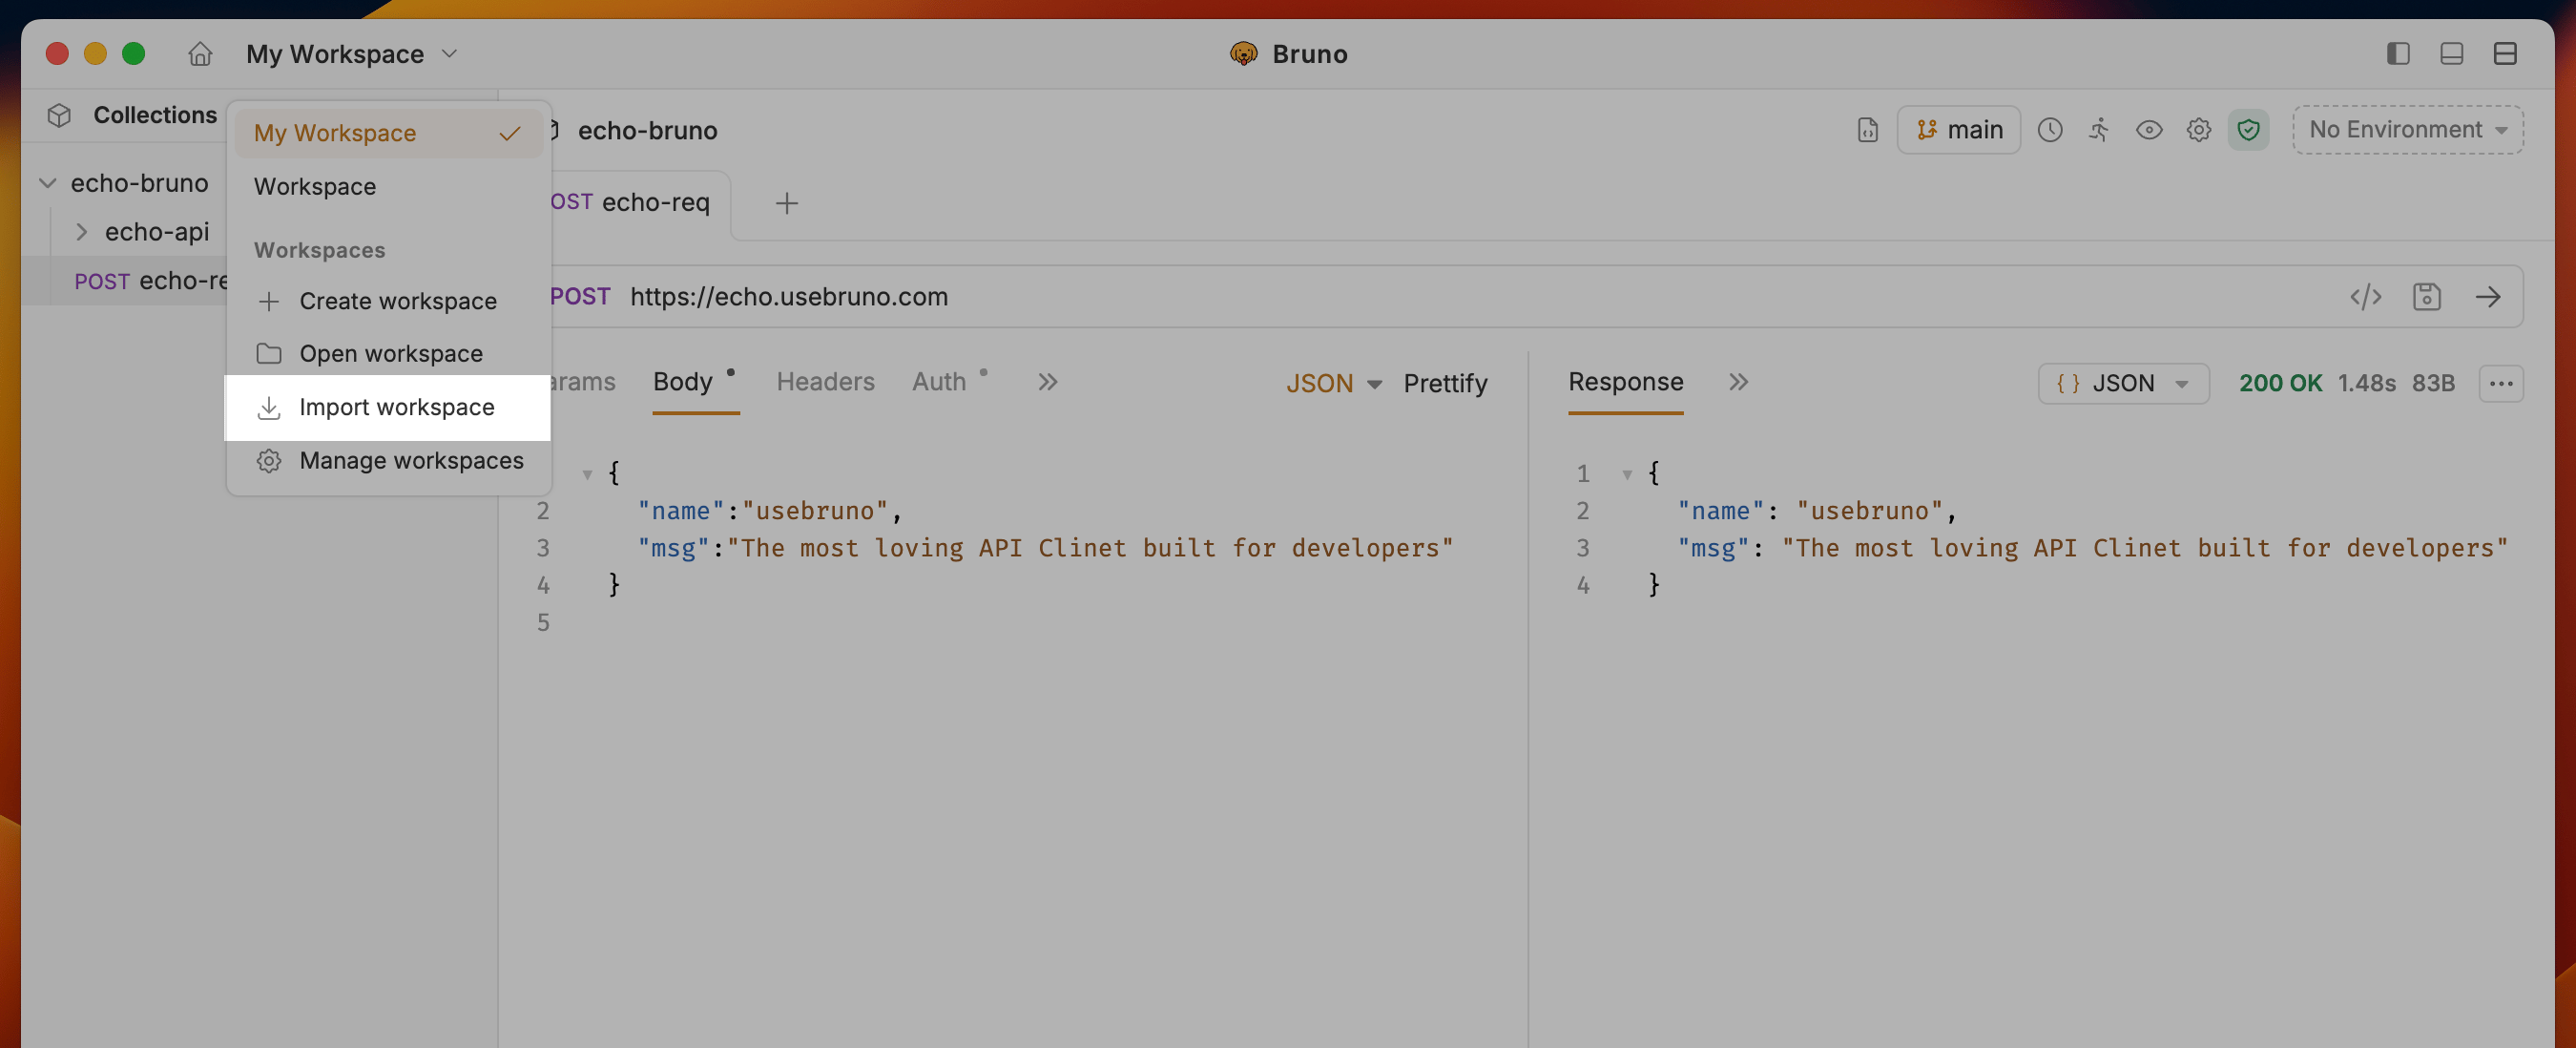
1. Open Bruno
2. Go to **Workspace** section and select **Import workspace** option from the dropdown menu.
4. After export you will get `.zip` file with all collections and configurations.
***
## Import Workspace
You can import a workspace in two ways: from a ZIP file or by cloning from a Git repository.
### Option 1: Import from ZIP File
**Use this when:** You have an exported workspace file or received a workspace backup from a colleague.
**Steps:**
1. Open Bruno
2. Go to **Workspace** section and select **Import workspace** option from the dropdown menu.
 3. Select **Import Workspace**
4. Choose **From ZIP File**
3. Select **Import Workspace**
4. Choose **From ZIP File**
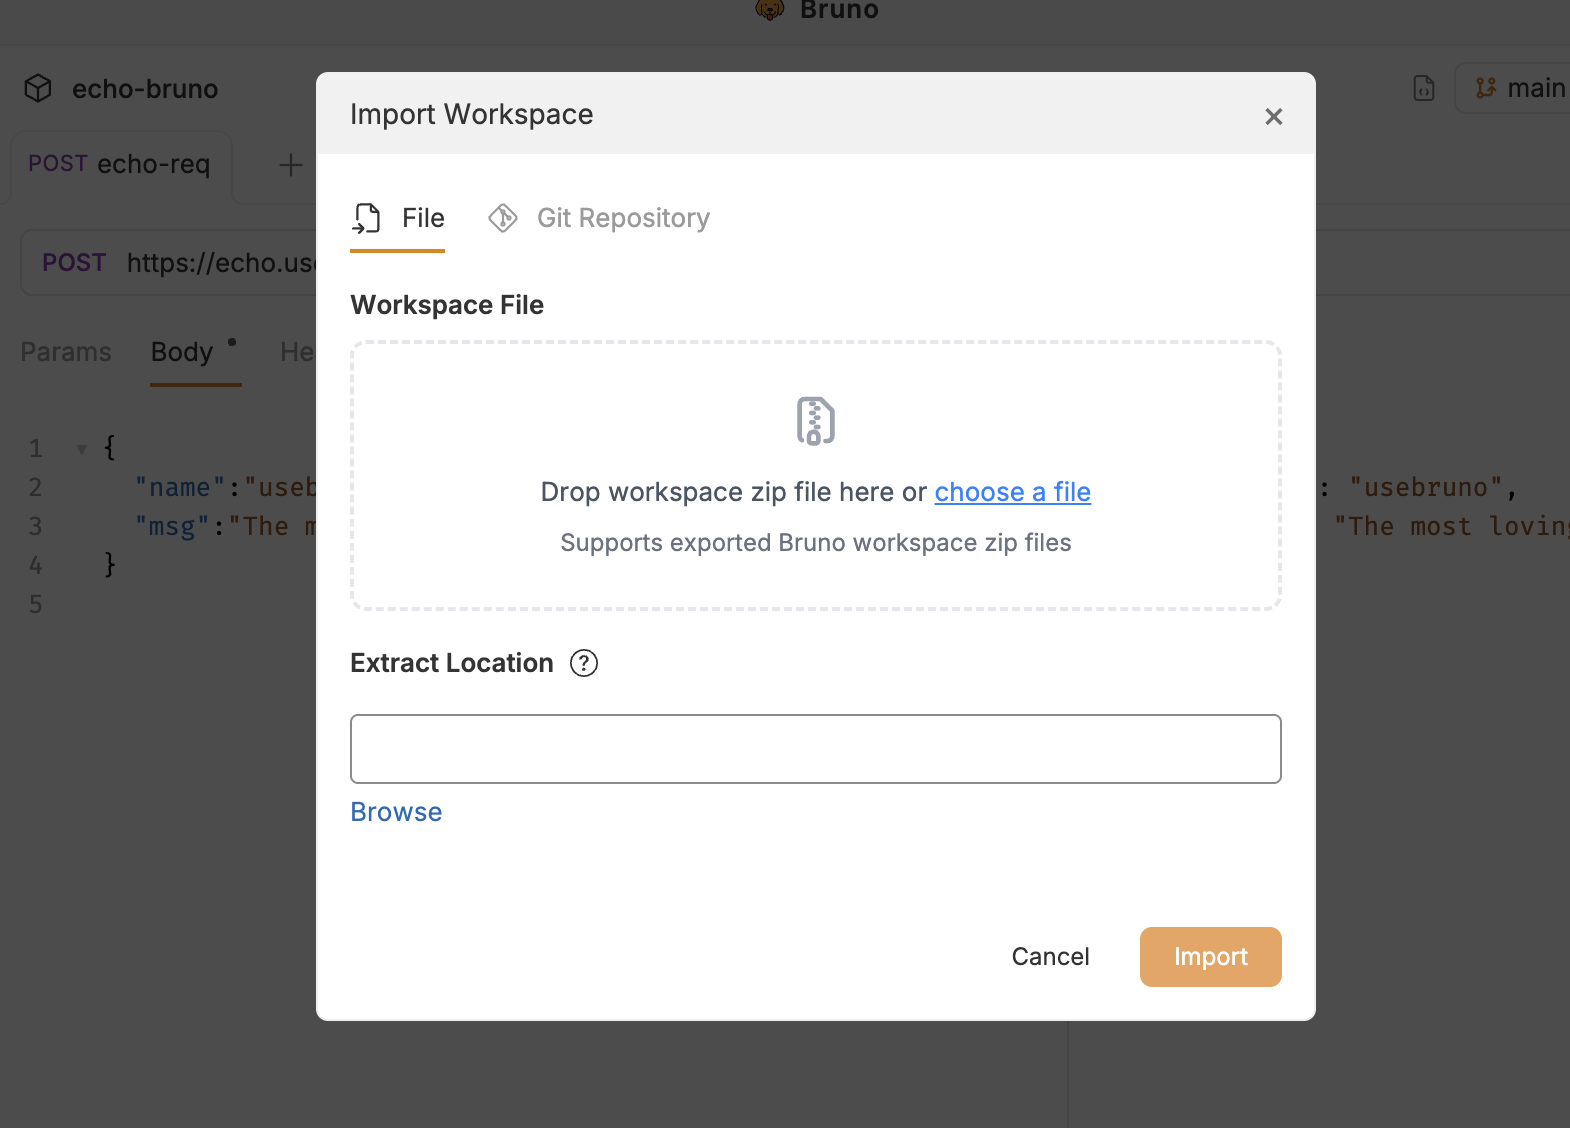 5. Browse and select your workspace `.zip` file
6. Choose a destination folder on your filesystem
7. Click **Import**
8. After import you will see all collections and configurations in the workspace.
***
### Option 2: Import from Git Repository
**Use this when:** Your workspace is stored in a Git repository for version control and team collaboration.
**Prerequisites:**
* The Git repository must contain a valid Bruno workspace
* You need appropriate access credentials for the repository
**Steps:**
1. Open Bruno
2. Go to **Workspace** section and select **Import workspace** option from the dropdown menu.
3. Select **Import Workspace**
4. Choose **Clone from Git Repository**
5. Browse and select your workspace `.zip` file
6. Choose a destination folder on your filesystem
7. Click **Import**
8. After import you will see all collections and configurations in the workspace.
***
### Option 2: Import from Git Repository
**Use this when:** Your workspace is stored in a Git repository for version control and team collaboration.
**Prerequisites:**
* The Git repository must contain a valid Bruno workspace
* You need appropriate access credentials for the repository
**Steps:**
1. Open Bruno
2. Go to **Workspace** section and select **Import workspace** option from the dropdown menu.
3. Select **Import Workspace**
4. Choose **Clone from Git Repository**
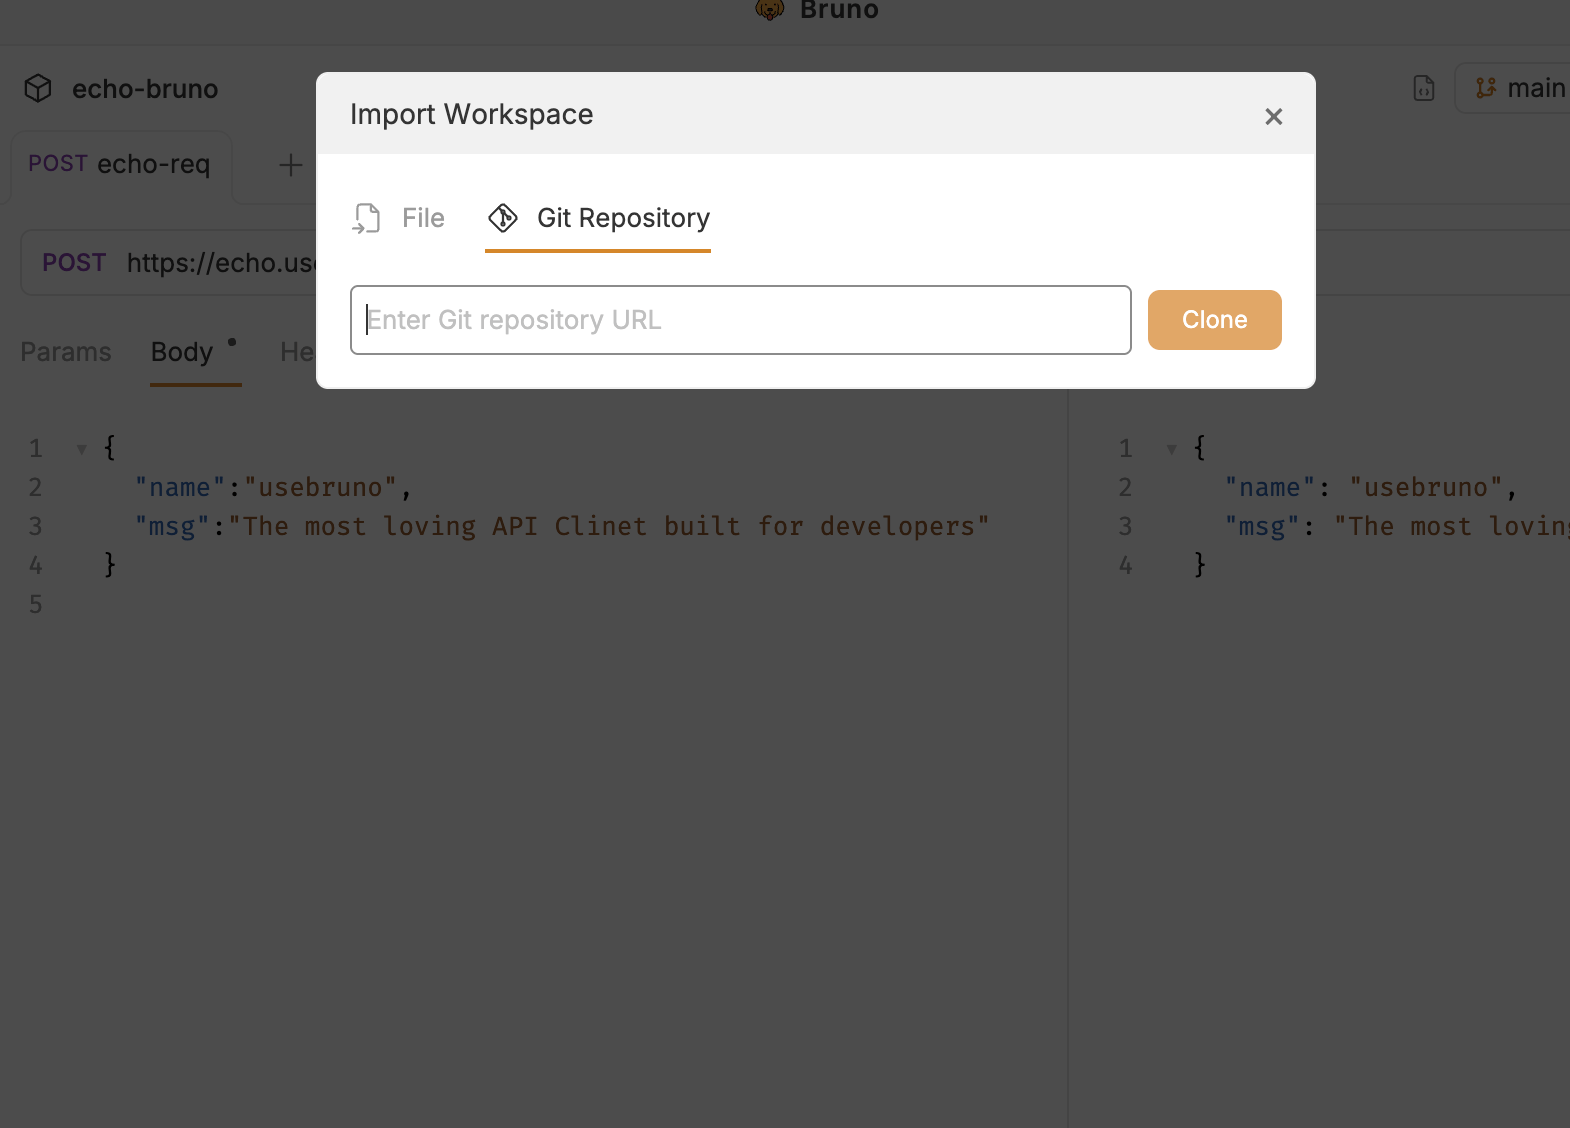 5. Enter the Git repository URL
6. Choose a local destination folder
7. Click **Clone**
The workspace will be cloned with full Git history. Any changes you make can be committed and pushed back to the repository.
***
5. Enter the Git repository URL
6. Choose a local destination folder
7. Click **Clone**
The workspace will be cloned with full Git history. Any changes you make can be committed and pushed back to the repository.
***